Houdini Tutorial
- Sep 30, 2015
- 3 min read
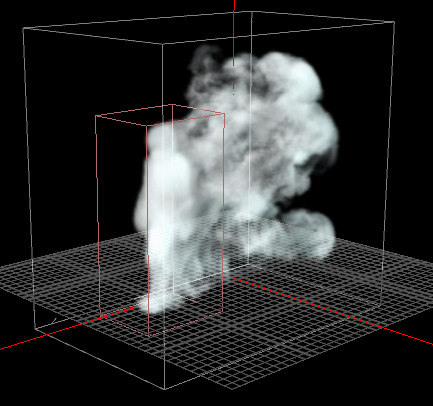
Marks Houdini tutorials which discussed useful hotkeys and commands and creating a billowy smoke was useful to understand the pyro solver and how to create and produce a dynamic and visually interesting result.
The tutorial took advantage of the billowy smoke shelf tools, and used a box primitive as an emitter. It showed how easy it was to use sidefx's intuitive shelf tools to easily get started with creating any type of effect.
In the shelf tool bar it ranges from RBD, Pyro FX, particle setups and many more. Showing that you can get started with some form of base template, which saves the hassle of creating your own solver which can be a complicated task.
It also goes through rendering using Houdini’s native renderer named mantra. Mantra is an extremely fast and powerful renderer as shown in the tutorial, and is able to handle a high amount of information.
The renderer has a variety of options to change, slightly similar to Arnold. Overall the tutorial was useful to get started in Houdini, and seeing how powerful the shelf tools can be in order to have a base template for you to start tweaking the effect to change the overall look.
I decided to start with the tutorial and then push it further, and attempt emitting a smoke simulation from a fast moving animated object. Tackling problems which come with fast moving objects which will become apparent later.
The emitter is extremely important, it changes the shape of the emitted smoke. For my small project which is based around Mark's tutorial, I used an animated character walking as my emitted object.
One of the main problems with the pyro sim is that the fluid container has to fit around the animated object and the smoke that's being simulated.
However that would need a huge fluid container which would calculate every voxel within that container, resulting in extreme simulation times.
First of all you need to import or create your animation, after importing it create an object merge and drag either your imported animation or the object with the animation into the "Object 1" path.
Cut and paste the object merge node into a new geometry node, you can now use the billowy smoke shelf tool on this geo node. Doing this will avoid getting some popcorn type effect when creating the smoke sim later on. (This is something you may or may not want, in this case I don't want it).
Then in order to track the animation correctly you need to adjust some settings within the auto-resize node within the dopnet. This node allows you to re-size the container based on the simulations movement.
The main attributes I changed was;
Padding: This attribute is the area around the density of the simulation. The space between the sim and the containers edge.
Track by Object: Ticket that on
In the Tracking Object, SOP Path, load your animation in.
Some problems which can be encountered depending on how fast the animation, is that you may get a stamp looking result, the reason for this is because it can't calculate the simulation that fast.
The one way around this is to increase the substeps on the DOPNET, however this can increase render times. And you could still get a small amount of stamping, in my case I increased it to 5 substeps.
What will help sell the effect will be the motion blur, to enable this and to stop some streaking, you can turn on motion blur within the fluid source, which is also automatically named "create density volume". The setting I increased was geometry samples. The higher the number the smoother the simulation. However be careful with this as it can skyrocket render times.
After all of that you should end up with a smooth smoke sim, with no popcorn shapes stamped or spacing in your simulation. The rest of the options are completely choice to create the simulation you want.


Comments